
Connecting Azure Fabric to Private API Management using Private Link Service Direct Connect
In this blog post I will explain how we used Azure Private Link Service Direct Connect combined with Fabric Managed Private Endpoints to securely connect our Azure Fabric notebooks to our private API Management instance. This setup allows us to call our internal APIs from Fabric without enabling public endpoints, while maintaining full network isolation and security.
What are Fabric Managed Private Endpoints?
Microsoft Fabric introduced Managed Private Endpoints to allow secure connectivity to Azure and on-premises data sources. When you create a Managed Private Endpoint in Fabric, it creates a private endpoint in Microsoft’s managed virtual network that connects to your Private Link Service.
The key advantage here is that you don’t need to manage the networking infrastructure. Fabric handles the virtual network, the private endpoint, and the DNS resolution. You simply point it at your Private Link Service, and Fabric takes care of the rest.
From your notebook’s perspective, you’re just calling a hostname (like apimdev01.azure-api.net), but behind the scenes, Fabric resolves this to the private endpoint IP and routes traffic through the Private Link Service to your private APIM in your VNet.
The Challenge
Our API Management (APIM) instance is deployed in our internal Azure VNet at 192.120.10.36 with public network access disabled. We needed to access this APIM from Azure Fabric notebooks to process data from our internal systems. The challenge is that Fabric runs in Microsoft’s managed virtual network, which doesn’t have direct connectivity to our private VNet. We also cant use the default Azure Fabric Managed Private Endpoints as at the time of writing they dont support APIM.
We needed a solution that:
- Keeps our APIM completely private (no public endpoints)
- Allows Fabric notebooks to call our APIM as if it were a native Azure service
- Doesn’t require complex networking for each Fabric workspace
- Maintains enterprise-grade security with proper SSL/TLS
- And if we can we want to avoid using virtual machines
Enter Private Link Service Direct Connect.
What is Private Link Service Direct Connect?
Azure Private Link Service allows you to expose your services privately to other Azure resources. The “Direct Connect” variant is specifically designed for scenarios where you don’t need a load balancer in front of your service.
Note that at the time of writing Private Link Service Direct Connect is still in public preview.
In a standard Private Link Service setup, traffic flows through a load balancer which then distributes to backend resources. With Direct Connect, the architecture is simpler:
Azure Fabric → Private Endpoint → Private Link Service → NAT subnet → Destination VNet
Key benefits of Direct Connect:
- No load balancer required - Reduces costs and complexity
- Direct routing - Traffic flows directly to your destination via User Defined Routes
- Lower latency - Fewer hops in the network path
- Simpler configuration - Less infrastructure to manage
The trade-off is that you can’t have multiple backends or health probes, but for our use case where we’re connecting to a single APIM instance, this is perfect.
Architecture Overview
Here’s what the complete architecture looks like:
Azure Fabric (Microsoft Managed VNet)
    ↓
Managed Private Endpoint (10.250.0.13 or whatever the assigned IP will be in the managed vnet (that you dont see))
    ↓
Private Link Service
    ↓
NAT Subnet (192.120.69.110, 192.120.69.111 or whatever IPs that will be assigned to the PLS private endpoint)
    ↓
VNet Peering or same VNet
    ↓
APIM Subnet (192.120.10.36)
The beauty of this setup is that:
- APIM has no public endpoints - it’s completely private
- Fabric can’t directly reach your VNet (different virtual networks)
- Private Link Service bridges the gap securely
- All traffic stays on the Microsoft backbone
- And no Virtual machines that act as gateway (and everyone that knows me, know that I dont like virtual machines :-) )
Our Implementation
Prerequisites
Before starting, make sure you have:
- APIM deployed in a VNet with public network access disabled
- A subnet for Private Link Service in your Azure VNet (can be same or different VNet as APIM and can be an existing subnet)
- VNet peering configured if APIM is in a different VNet (optional if same VNet)
- Contributor permissions on the resource groups for both networking and Fabric
- Fabric workspace where you’ll create the Managed Private Endpoint
Step 1: Create the Private Link Service (Direct Connect Mode)
The critical part here is to create the Private Link Service without a load balancer and use the -DestinationIPAddress parameter to specify your APIM’s private IP. This is what makes it Direct Connect.
# Define variables
$resourceGroupName = "rg-networking"
$location = "AustraliaEast"
$vnetName = "vnet-prod"
$subnetName = "snet-privatelink"
$plsName = "pls-directconnect"
$destinationIP = "192.120.10.36"  # Your APIM's private IP

# Get vnet
$vnet = Get-AzVirtualNetwork -Name $vnetName -ResourceGroupName $resourceGroupName

# Get subnet reference
$subnet = Get-AzVirtualNetworkSubnetConfig -VirtualNetwork $vnet -Name $subnetName

# Create IP configurations for Private Link service
# Note: Minimum 2 IPs required (or multiples of 2) for high availability
$ipConfig1 = @{
    Name = "ipconfig1"
    PrivateIpAllocationMethod = "Dynamic"
    Subnet = $subnet
    Primary = $true
}

$ipConfig2 = @{
    Name = "ipconfig2"
    PrivateIpAllocationMethod = "Dynamic"
    Subnet = $subnet
    Primary = $false
}

# Create Private Link service Direct Connect
$pls = New-AzPrivateLinkService `
    -Name $plsName `
    -ResourceGroupName $resourceGroupName `
    -Location $location `
    -IpConfiguration @($ipConfig1, $ipConfig2) `
    -DestinationIPAddress $destinationIP

Write-Output "Private Link service created successfully!"
Write-Output "Private Link service ID: $($pls.Id)"
Write-Output "Destination IP Address: $destinationIP"
Keep the $pls.Id as you will need it later.
The key differences from a standard Private Link Service:
- No
-LoadBalancerFrontendIpConfiguration- This makes it Direct Connect mode - Using
-DestinationIPAddress- This tells Azure where to route the traffic directly - Dynamic IP allocation - The NAT IPs are assigned automatically from your subnet
- 2 IP configurations - Required for redundancy (Azure requires minimum 2 or multiples of 2)
Step 3: Create Managed Private Endpoint in Fabric
Now we create the Managed Private Endpoint in Fabric. This needs to be done via REST API as it’s not yet available in the Fabric portal UI.
Step 3.1: Get your Fabric workspace ID
Navigate to your Fabric workspace in the browser. The workspace ID is in the URL:
https://app.fabric.microsoft.com/groups/{workspace-id}/...
Copy this workspace ID - you’ll need it for the API call.
Step 3.2: Get an access token for Fabric API
First, login to Azure and get an access token for the Fabric API:
az login

az account get-access-token --resource https://api.fabric.microsoft.com
This returns a JSON object. Copy the value of accessToken - you’ll need it for the next step.
Step 3.3: Create the Managed Private Endpoint using Postman
We’ll use Postman to call the Fabric REST API. You can also use PowerShell (shown below) or any REST client.
Postman Setup:
- Method: POST
- URL:
https://api.fabric.microsoft.com/v1/workspaces/{workspace-id}/managedPrivateEndpoints - Headers:
Authorization:Bearer <access_token>(the token from step 4.2)Content-Type:application/json
- Body (raw JSON):
{
  "name": "APIM-endpoint",
  "targetPrivateLinkResourceId": "/subscriptions/{subscription-id}/resourceGroups/{resource-group}/providers/Microsoft.Network/privateLinkServices/pls-directconnect",
  "targetFQDNs": ["apimdev01.azure-api.net"],
  "requestMessage": "Private connection request from Fabric to APIM"
}
Important: Use
targetFQDNs(plural) nottargetFQDN(singular). The API expects an array of FQDNs. Replaceapimdev01.azure-api.netwith your APIM’s actual hostname (could be the default*.azure-api.netdomain or your custom domain).
After sending the request, you should get a response with the created endpoint details. The connection will be in “Pending” state until approved in the next step.
If your Azure Fabric is behind an inbound Private DNS you will need to change the https://api.fabric.microsoft.com/v1/workspaces/{workspace-id}/managedPrivateEndpoints hostname to match the name stored in your Fabric Private dns zone.
Step 5: Approve the Private Endpoint Connection
After creating the MPE, you need to approve the connection in Azure.
$pls = Get-AzPrivateLinkService -Name "pls-directconnect" -ResourceGroupName "rg-networking"

# Get the pending connection
$connection = $pls.PrivateEndpointConnections | Where-Object {
    $_.PrivateLinkServiceConnectionState.Status -eq "Pending"
}

# Approve it
Approve-AzPrivateEndpointConnection `
    -ResourceGroupName "rg-networking" `
    -ServiceName "pls-directconnect" `
    -Name $connection.Name `
    -Description "Approved for Fabric access"
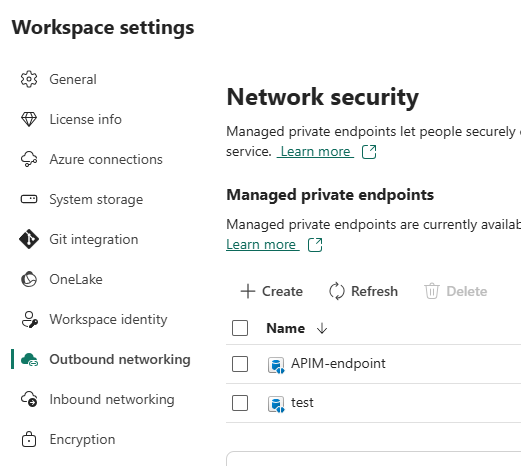
Once approved, wait a few minutes for the connection to activate. You can check the status in the Fabric workspace settings under “Workspace settings” → “Outbound Networking”.
Using the Connection in Fabric Notebooks
Once everything is configured, you can start calling your private APIM from Fabric notebooks. Here’s a working example:
import requests
import urllib3

# Disable SSL warnings for internal certificates (only do this in dev)
urllib3.disable_warnings(urllib3.exceptions.InsecureRequestWarning)

# Your Private Link endpoint (use your APIM hostname)
base_url = "https://apimdev01.azure-api.net"

# Headers (add your APIM subscription key or authentication)
headers = {
    "Content-Type": "application/json",
    "Ocp-Apim-Subscription-Key": "your-subscription-key"
}

# Make the call
response = requests.get(
    f"{base_url}/api/v1/getStatus", #or whatever your api endpoint is
    headers=headers,
    verify=False,  # For internal certs
    timeout=30
)

print(f"Status Code: {response.status_code}")
print(f"Response: {response.json()}")
When you run this, you’ll see the DNS resolves to the Private Endpoint IP (something like 10.250.0.13), not your APIM’s private IP (192.120.10.36). This is expected behavior - Private Link abstracts the backend IP by design. But the traffic does reach your APIM in your VNet.
Troubleshooting
Issue: Connection Timeout
If you get connection timeouts, check these in order:
- Verify MPE is Approved
$pls = Get-AzPrivateLinkService -Name $plsName -ResourceGroupName $resourceGroupName
$pls.PrivateEndpointConnections | Select-Object Name, @{N='Status';E={$_.PrivateLinkServiceConnectionState.Status}}
Status should be “Approved”, not “Pending”.
-
Check NSG rules - Most connection timeouts are caused by NSG rules. Verify your APIM’s NSG allows inbound traffic from the Private Link Service subnet.
- Verify the destination IP - Double-check that your Private Link Service has the correct destination IP:
$pls = Get-AzPrivateLinkService -Name $plsName -ResourceGroupName $resourceGroupName
Write-Output "Destination IP: $($pls.DestinationIPAddress)"
This should match your APIM’s private IP (
192.120.10.36). - Test from PLS subnet - Deploy a test VM in your Private Link Service subnet and verify it can reach your APIM:
# From a VM in the PLS subnet
curl -v https://192.120.10.36:443
If this fails, the issue is with NSGs or VNet peering, not Private Link Service.
- Verify VNet peering - If your Private Link Service subnet and APIM subnet are in different VNets, ensure VNet peering is configured and in “Connected” state:
$vnet = Get-AzVirtualNetwork -Name $vnetName -ResourceGroupName $resourceGroupName
$vnet.VirtualNetworkPeerings | Select-Object Name, PeeringState
Issue: DNS Not Resolving
If DNS doesn’t resolve to the Private Endpoint IP:
- Check the Managed Private Endpoint status in Fabric portal
- Verify it shows “Succeeded” for Activation
- Wait 5-10 minutes after approval for DNS propagation
- Test DNS resolution from your notebook:
import socket
ip = socket.getaddrinfo("apimdev01.azure-api.net", None)[0][4][0]
print(f"Resolves to: {ip}")  # Should be 10.250.0.x
Issue: 401 Unauthorized
This means Private Link is working, but authentication is failing:
- Verify your APIM subscription key is correct
- Check your APIM has the appropriate authentication configured
- Try accessing the APIM from within Azure first (e.g., from a VM in the same VNet) to confirm the API works
Issue: SSL Certificate Errors
This is expected if your APIM uses internal certificates. For production, you should:
- Download your organization’s Root CA certificate
- Upload it to your Fabric environment
- Use
verify=CA_CERT_PATHinstead ofverify=False
For development and testing on private networks, use verify=False
Verifying the Setup
To verify your Private Link is working correctly, create a Python notebook in Azure Fabric:
import socket
import ssl
import time

host = "apimdev01.azure-api.net"

print("=" * 70)
print("Private Link Connection Diagnostics")
print("=" * 70)

# Test 1: DNS Resolution
try:
    ip = socket.getaddrinfo(host, None)[0][4][0]
    print(f"✓ DNS Resolution: {host} → {ip}")
    if ip.startswith("10."):
        print(f"  ✓ Resolving to Private Endpoint IP (expected)")
    else:
        print(f"  ✗ Not resolving to Private Endpoint!")
except Exception as e:
    print(f"✗ DNS failed: {e}")

# Test 2: TCP Connection
try:
    start = time.time()
    sock = socket.create_connection((host, 443), timeout=10)
    elapsed = time.time() - start
    print(f"✓ TCP Connection: Success in {elapsed:.3f}s")
    print(f"  Remote address: {sock.getpeername()}")
    sock.close()
except Exception as e:
    print(f"✗ TCP Connection failed: {e}")

# Test 3: SSL Handshake
try:
    context = ssl._create_unverified_context()
    sock = socket.create_connection((host, 443), timeout=10)
    ssock = context.wrap_socket(sock, server_hostname=host)
    print(f"✓ SSL Handshake: {ssock.version()} - Success")
    ssock.close()
except Exception as e:
    print(f"✗ SSL Handshake failed: {e}")

print("=" * 70)
If all three tests pass, your Private Link Direct Connect is working correctly!
Key Learnings
-
Use
-DestinationIPAddressfor simplicity - This parameter handles routing automatically. Just specify your APIM’s private IP and Azure takes care of the rest. No need for complex UDR configurations. -
2 IP configurations required - Azure requires minimum 2 IP configurations (or multiples of 2) for Private Link Service. Use dynamic allocation to let Azure assign them automatically.
-
No load balancer needed - The absence of
-LoadBalancerFrontendIpConfigurationis what makes it Direct Connect. This saves costs and reduces complexity. -
The Private Endpoint IP is correct - When you see traffic going to
10.250.0.x, that’s expected. The Private Endpoint abstracts the backend IP by design. -
NSG rules are critical - Make sure your APIM’s NSG allows inbound traffic from the Private Link Service subnet. This is often the cause of connection timeouts.
-
Approval is required - Don’t forget to approve the Private Endpoint connection after creating the MPE in Fabric. The connection will remain in “Pending” state until you approve it.
-
Public endpoints not needed - One of the best parts of this solution is that your APIM never needs public network access enabled. It stays completely private.
-
Test from the NAT subnet - If you’re troubleshooting, deploy a test VM in your Private Link Service subnet and verify it can reach your APIM at
192.120.10.36. This isolates Private Link issues from network routing issues.
Conclusion
Using Private Link Service Direct connect I was able to connect from my Azure Fabric directly to an internal IP address without the need of a VM that acts as a gateway.
Hope this helps,
Alex
Leave a comment