Change the subnet and IP of a specific Azure ARM virtual machine with PowerShell
Hi everyone,
Couple of days ago I had to enable traffic between an environment in Azure and an on-premise environment. We already have an Azure gateway installed and a VPN connection between another VNET in our Azure environment so I wanted to reuse that one and just setup VNET peering between the two Azure Vnets to allow traffic down. VNet Peering is a mechanism to connect two Virtual Networks in the same region through the Azure backbone network. Once peered, the two Virtual Networks will appear like a single Virtual Network for all connectivity purposes. This graphic will make it easier to understand what I wanted to do:
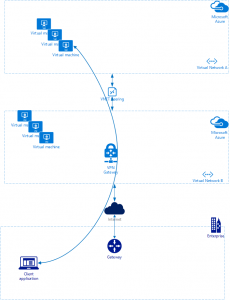
You just enable vnet peering between the 2 vnets and allow traffic to go through the Azure gateway. In my case however the subnet used in virtual network A was already used somewhere else on-premise so I would not be able have a correct routing. The only way to solve this issue would be to change the IP address space and subnet and then assign a new IP address to the virtual machines in virtual network A.
1: Add new address space
In the Azure portal go to your Vnet (Virtual Network A) and add an extra address space.
Please note that if you have already setup a Vnet peering between two vnets you can no longer edit or change those Vnet’s. So if you want to add another address space to a Vnet with an existing peering, you will needto delete the peering first.
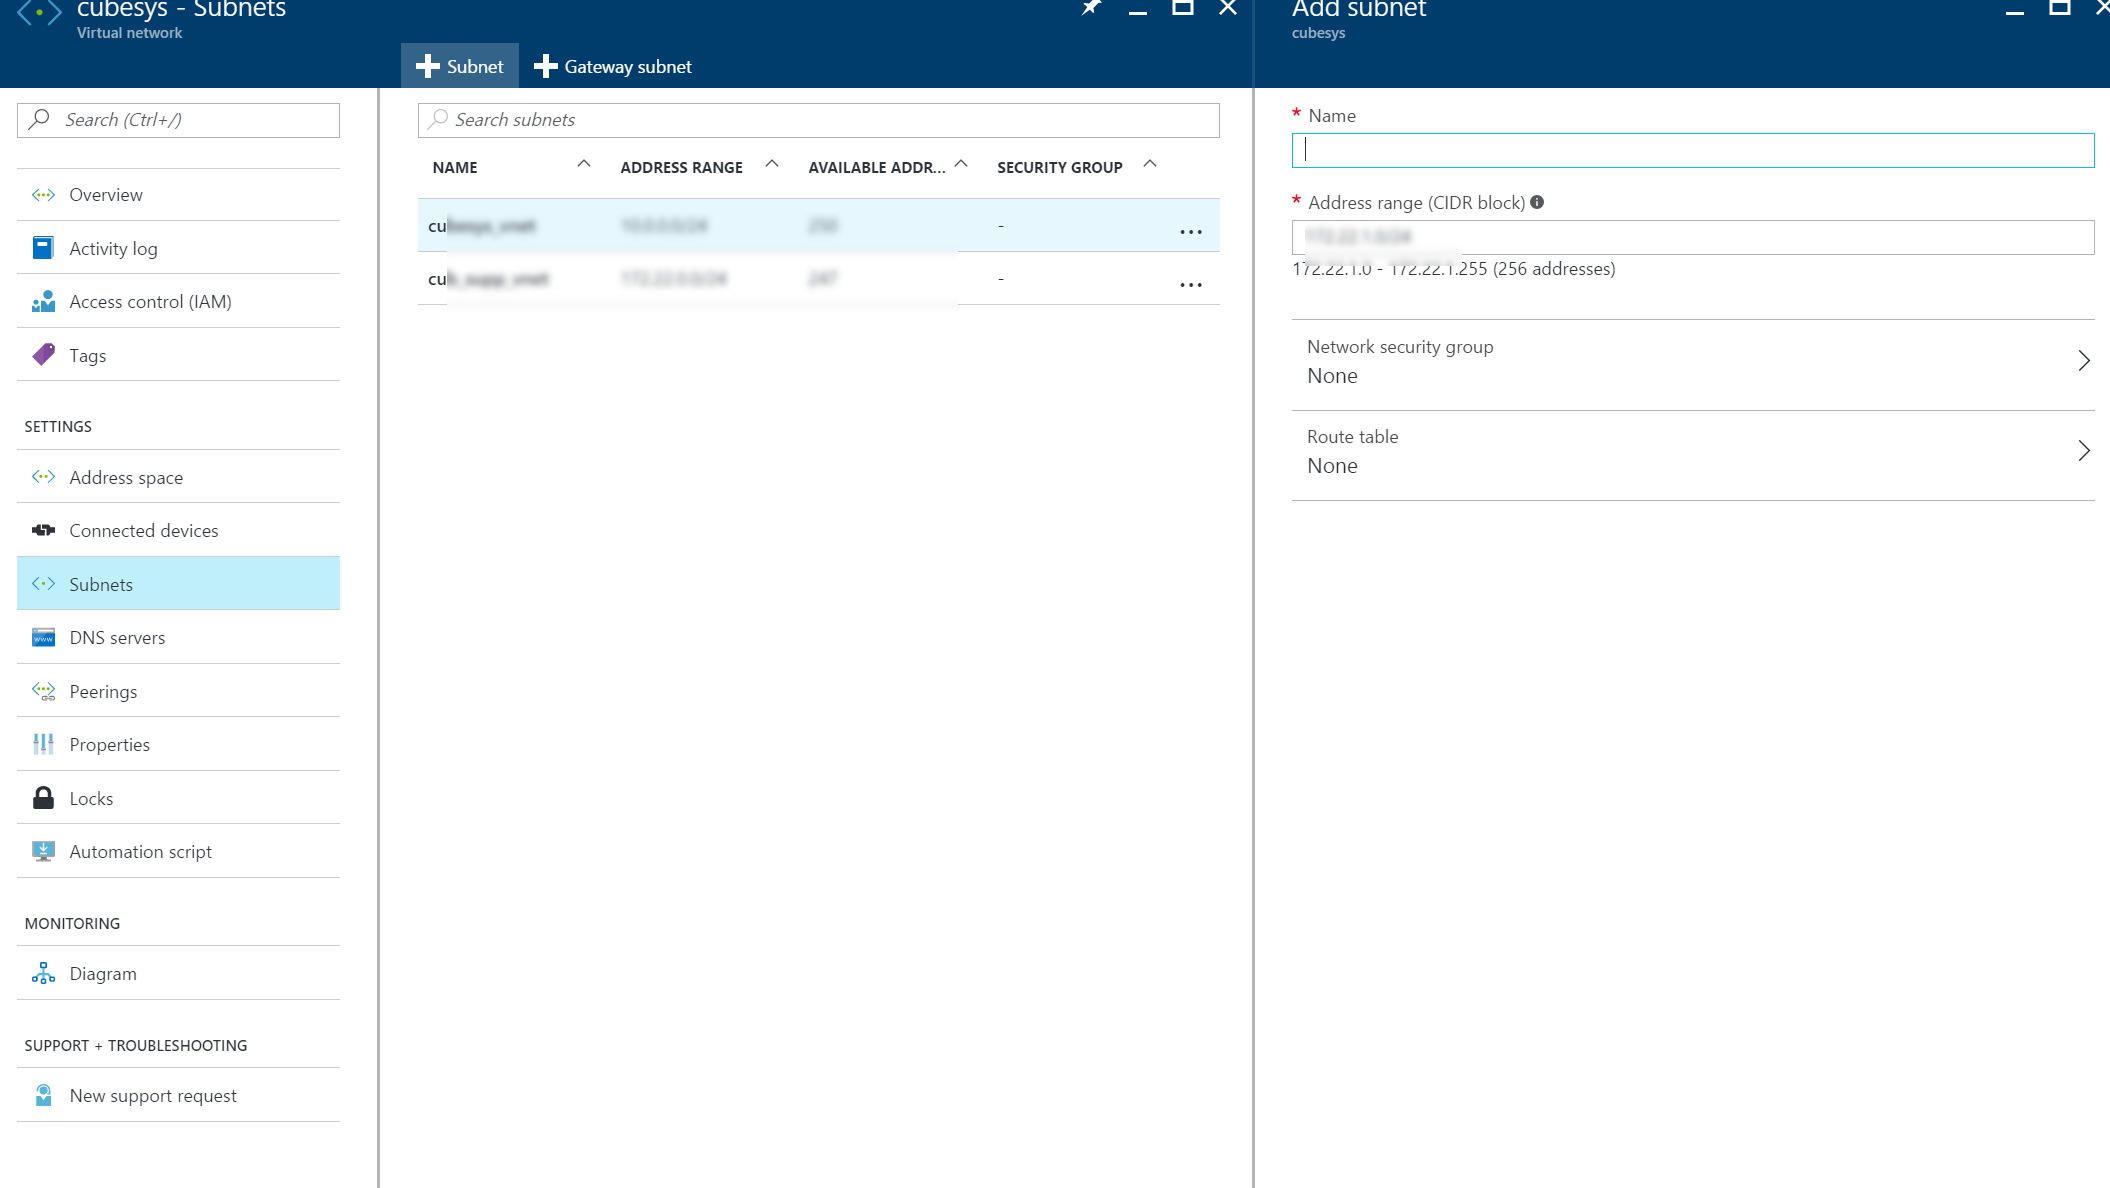
2: Add new subnet
Once the new address space has been added you can add a new subnet in the new address space.
3: Change IP addresses
Now that we have our new subnet which doesn’t overlap with anything on premise we can change the IP settings of our Azure virtual machines in virtual network A.
To change the subnets and IP addresses of my virtual machines I used the following PowerShell script:
You just have to specify the following variables: resource group where the virtual machines are located, name of the virtual machine for which you want to change the IP address setting, the new target subnet, and the new IP address.
###
#This script will change the subnet of a specified virtual machine and allocate a static IP
###

##############################################################
#define Variables
$RGname = 'Support' #VM and NIC RG
$VMName = 'AZ1' #VM Name
$VNetName = 'cubesys' #Virt Net name
$TarSubnetName = 'cub_supp_vnet' #Target subnet name
$StaticIP = ‘172.22.0.8'
##############################################################

#region Get Azure Subscriptions
Login-AzureRmAccount
$subscriptions = Get-AzureRmSubscription
$menu = @{}
for ($i = 1;$i -le $subscriptions.count; $i++)
{
  Write-Host -Object "$i. $($subscriptions[$i-1].SubscriptionName)"
  $menu.Add($i,($subscriptions[$i-1].SubscriptionId))
}
[int]$ans = Read-Host -Prompt 'Enter selection'
$subscriptionID = $menu.Item($ans)
$subscription = Get-AzureRmSubscription -SubscriptionId $subscriptionID
Set-AzureRmContext -SubscriptionName $subscription.SubscriptionName
#endregion


#retrieve VM and network
$VM = Get-AzureRmVM -Name $VMName -ResourceGroupName $RGname
$NIC = get-azurermnetworkinterface -ResourceGroupName $RGname | where -Property Id -EQ $VM.NetworkInterfaceIDs

$VNET = Get-AzureRmVirtualNetwork -Name $VNetName -ResourceGroupName $RGname
$TarSubnet = Get-AzureRmVirtualNetworkSubnetConfig -VirtualNetwork $VNET -Name $TarSubnetName

#set new subnet
$NIC.IpConfigurations[0].Subnet.Id = $TarSubnet.Id
Set-AzureRmNetworkInterface -NetworkInterface $NIC

#Once the subnet has been set and applied we can apply the static IP address
$NIC.IpConfigurations[0].PrivateIpAddress = $StaticIP
$NIC.IpConfigurations[0].PrivateIPAllocationMethod = 'Static'
Set-AzureRmNetworkInterface -NetworkInterface $NIC

#output
$prv =  $NIC.IpConfigurations | select-object -ExpandProperty PrivateIpAddress
$alloc =  $NIC.IpConfigurations | select-object -ExpandProperty PrivateIpAllocationMethod
Write-Output "$($vm.Name) : $prv , $alloc"
4: Setup Vnet Peering
Lastly we enable Vnet Peering so that the machines from Virtual Network A can peer with Virtual Network B and reach the on-premise network.
There are a few configurable properties for each link:
| Option | Description | Default |
|---|---|---|
| AllowVirtualNetworkAccess | Whether address space of Peer VNet to be included as part of the Virtual_network Tag | Yes |
| AllowForwardedTraffic | Whether traffic not originating from a peered VNet is accepted or dropped | No |
| AllowGatewayTransit | Allows the peer VNet to use your VNet gateway | No |
| UseRemoteGateways | Use your peer’s VNet gateway. The peer VNet must have a gateway configured and AllowGatewayTransit is selected. You cannot use this option if you have a gateway configured | No |
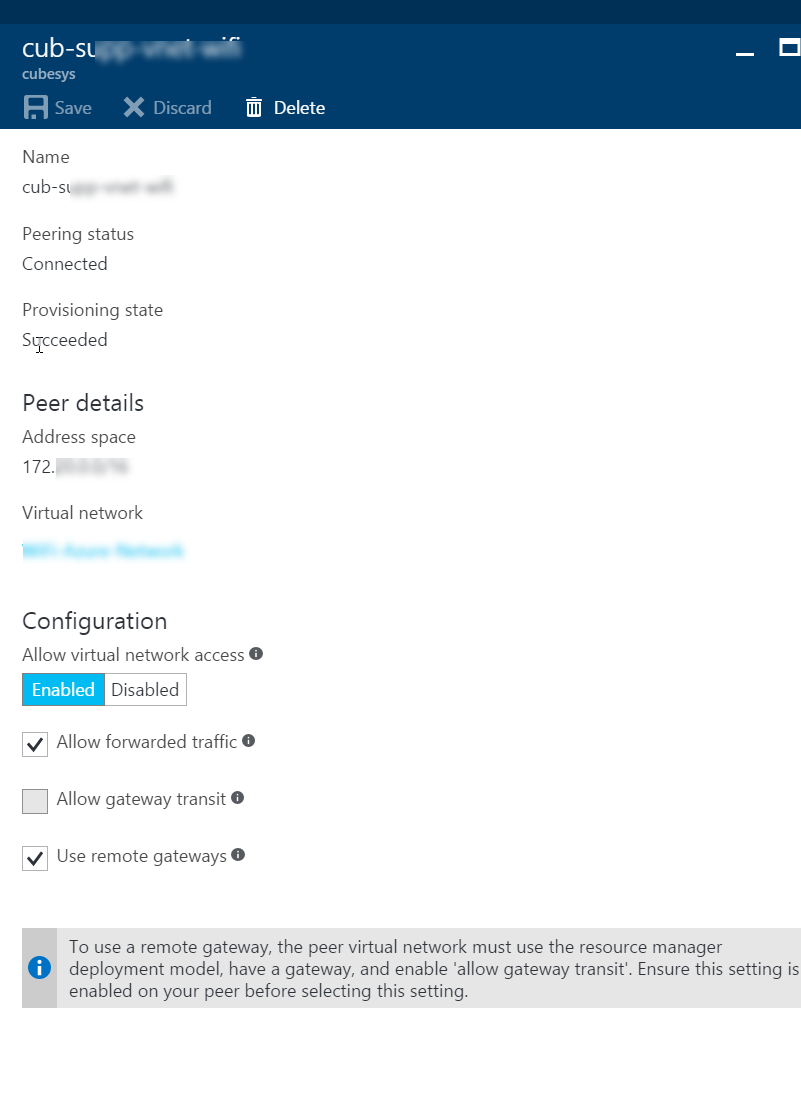
So we have to enable AllowGatewayTransit for Virtual Network B and UseRemoteGateways for Virtual Network A.
Each link in VNet peering has a set of above properties. From portal, you can click the VNet Peering Link and change any available options, click Save to make the change effect.
- In Virtual Networks blade, choose VirtualNetwork A, click Peerings, then click Add
- In the Add Peering blade, give a peering link name LinkToVnetB, choose the subscription and the peer VirtualNetwork B, Click UseRemoteGateways and click OK.
- Next create the VNET peering link for VirtualNetwork B to VirtualNetwork A. In Virtual Networks blade, choose VirtualNetwork B, click Peerings, then click Add
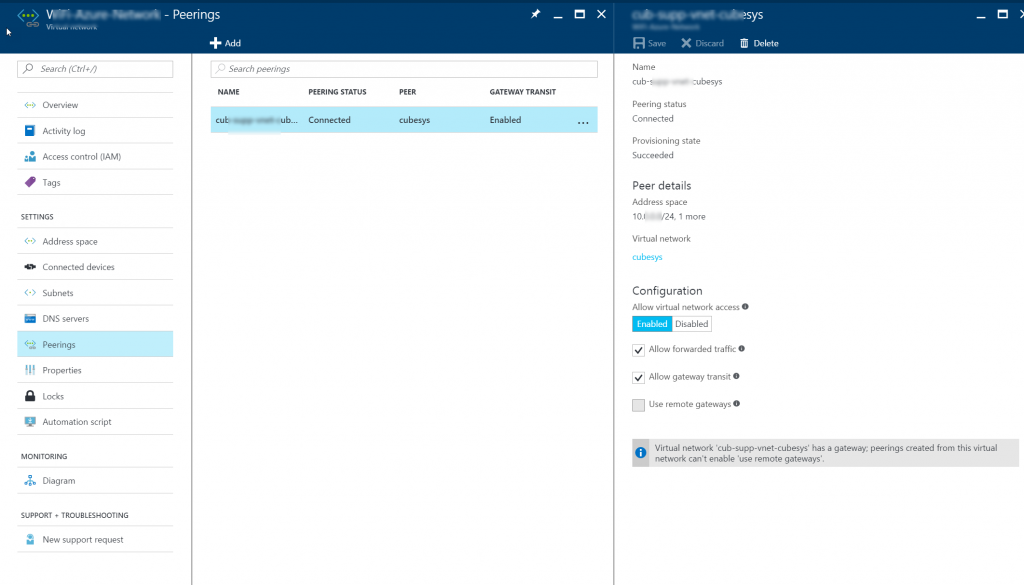
- In the Add Peering blade, give a peering link name LinkToVnetA, choose the subscription and the peer Virtual Network, Select AllowGatewayTransit and Click OK.

That’s it! So by changing the IP address of my virtual machine in Virtual Network A and enabling Vnet Peering with a virtual network that has a Gateway and VPN connection to an on-premise environment I’m able to enable connectivity from 2 different Vnets in Azure with only 1 Azure Gateway.
Hope this helps,
Alex
Leave a comment