Cross subscription VNET peering deployment with Azure Blueprints
A common design pattern in Azure is the Hub and Spoke topology as described here. In this blog post I will describe how you can deploy a spoke environment in a different subscription and enable VNET-peering to the hub environment with Blueprints. We assume that the Hub environment is already fully configured and deployed.
We are going to use an ARM template as an artifact in our Blueprint that will do the following:
- Deploy a new VNET in our Spoke subscription
- Deploy new Spoke subnet
- Configure VNET peering from spoke-to-hub in our Spoke subscription
- Configure VNET peering from hub-to-spoke in our Hub subscription
To be able to configure VNET peering with Blueprints in another subscription we need to use an Azure Managed Identity which is still in preview.
Azure Managed Identity
Managed identities for Azure resources provides Azure services with a managed identity in Azure Active Directory. You can use this identity to authenticate to services that support Azure AD authentication, without needing credentials in your code. We will be using User-assigned managed entity.
- In the search box, type Managed Identities, and under Services, click Managed Identities.
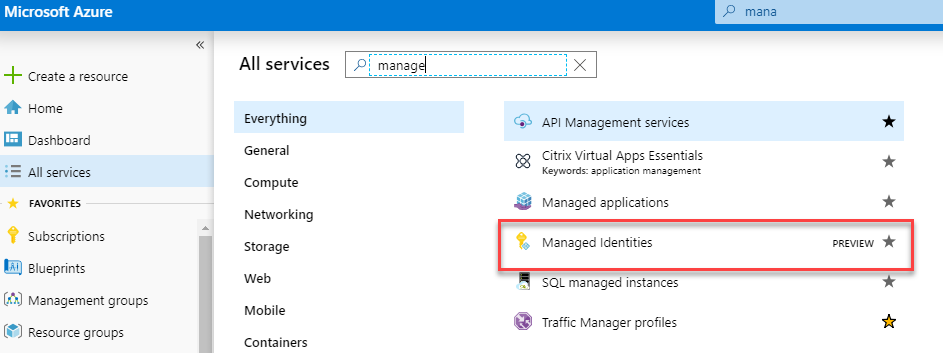
- Click Add and enter values in the following fields under Create user assigned managed identity pane:
- Resource Name: This is the name for your user-assigned managed identity, for example MI BLueprint.
- Subscription: Choose the subscription to create the user-assigned managed identity under
- Resource Group: Create a new resource group to contain your user-assigned managed identity or choose Use existing to create the user-assigned managed identity in an existing resource group.
- Location: Choose a location to deploy the user-assigned managed identity, for example Australia East.
- Click Create.
- Once created give the newly created managed identity the appropriate permissions on your hub and spoke subscription.
Vnet Peering with Blueprint
Download the Blueprint example from
https://github.com/averkinderen/Azure/tree/master/Blueprint-VNET-peering.
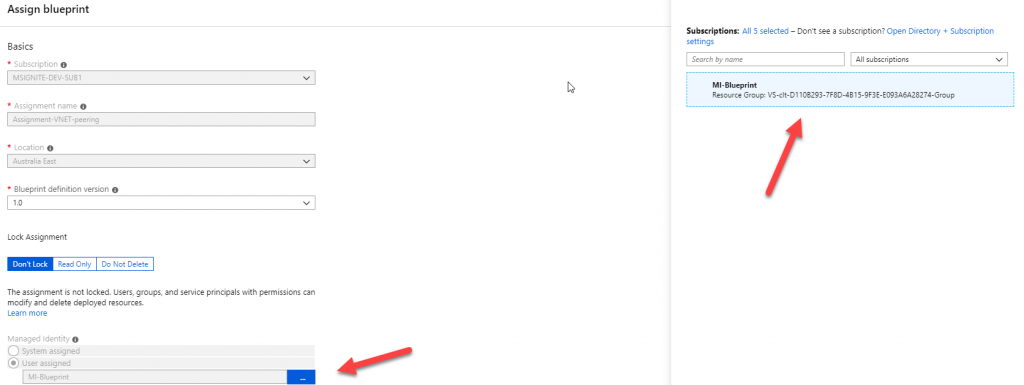
And use the import function of Jim’s Britt PowerShell script to import the Blueprint in your environment. Once imported, assign the Blueprint to the spoke subscription and select the newly created managed entity:
 ](/wp-content/uploads/2019/03/mi5.png)
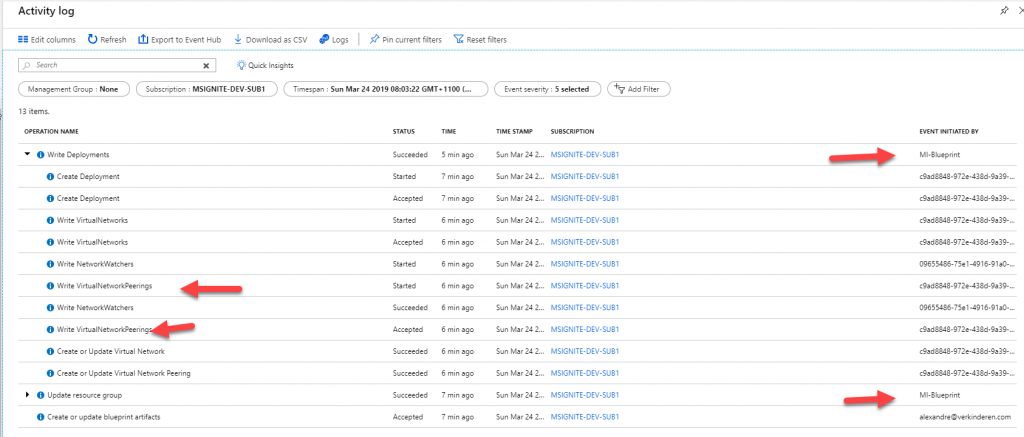
After the assignment you can follow the progress in the activity log. Notice the operations that are using the newly created managed identity:
 ](/wp-content/uploads/2019/03/mi6.png)
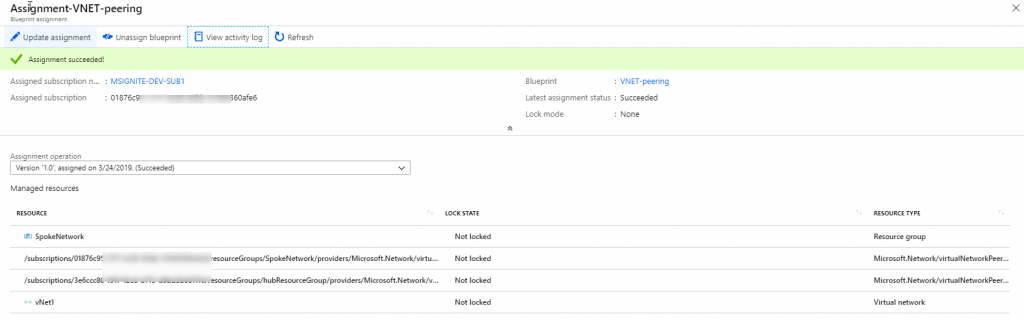
In a few seconds the deployment will be completed
 ](/wp-content/uploads/2019/03/mi7.png)
Now, let’s have a look at the status of the VNET peering:
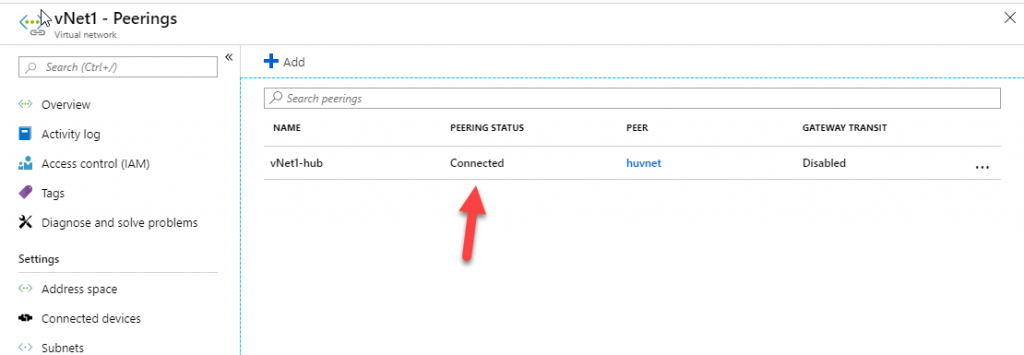 ](/wp-content/uploads/2019/03/vnet.png)
As you can see, by using Azure Managed entity and Blueprints it’s now easier than ever to deploy cloud environments in a repeatable manner using composable artifacts. Every time we have a new spoke subscription we can assign the Blueprint and the vnet and peering will be configured automatically.
Hope this helps,
Alex
Leave a comment