Step by Step guide on installing the Azure Usage and Billing Insights (AUBI) Portal
A lot of my customers are struggling with the billing part of Azure. They need a convenient way to review and visualize what they have consumed in Azure. I discovered the Azure Usage and Billing Insights (AUBI) portal couple of weeks ago, which does exactly this! This solution is designed to retrieve usage details of all Azure services in specific Azure subscription(s). Using a PowerBI dashboard, one can retrieve up to date billing data (Azure service usage details) of a subscription.
This blog post will cover how to install and use the AUBI portal. There are couple of steps we need to follow:
- Download all the required files from the GitHub repository
- First we need to create the required services in Azure
- Next we need to deploy the Visual Studio solution to Azure Webapps
- Then we need to configure Azure Active Directory to allow the AUBI application to be multi-tenant
- Then we need to create the required SQL tables to store the usage information
- And last we can start using the PowerBI desktop
1) Create required services in Azure
To be able to run the Azure Usage and Billing Insights Portal you will need the following services in Azure:
- One public website called Registration where any user can provide access to the site and register their Azure subscriptions.
- One website called Dashboard, where only authenticated users can see the list of registered subscriptions and trigger a job to re-generate up to date billing data in case of any inconsistency.
- One AzureSQL Server to hold billing and usage data for all registered subscriptions.
- One Azure Storage Queue to hold “generate data” requests.
- One schedule base (every UTC night) running webjob that is triggered once a day to create “generate data” request for each registered subscription.
- One continuous running webjob to process requests that are waiting in the Azure Storage Queue.
- PowerBi dashboard for data visualization of all or per subscription Azure service billing and usage details like service unit, quantity, usage duration, etc.
To create the services, you have to run the following script in PowerShell: CreateAzureServicesScript.ps1 with its dependency file CreateAzureServicesScriptResources.json
First open the JSON template file and change the variables if required. Make sure to change the subscription name and default password to reflect your own subscription. Don’t change the region though, as the ARM template is using some Application Insights components which are only available in Central US region.
Next, open PowerShell ISE in administrative mode and run the .\CreateAzureServicesScript.ps1 script

You can verify if the Azure services have been created successfully in the Azure portal

Make sure your client IP address has been added to the SQL server firewall exception list, or you will run into issues when trying to deploy the solution with Visual Studio later on.
Once the script is successfully executed, it will output all parameter values with their names in PowerShell ISE.
Don’t close your PowerShell window as we will need those output parameters later on to update the configuration (Web.config and App.config) files inside the solution with these new service settings before compiling and publishing them with Visual Studio.

In case there are any errors during the execution of the Powershell script (maybe because the service name that you assigned in the parameters is not unique), you can delete the resource group from Azure management portal and restart the Powershell script with new parameters.
2) Deploy the AUBI Solution with Visual Studio
Using the output values from the PowerShell script we can now update our web.config files and App.config files. Open the AUI.sln in Visual Studio. Next open the Web.config file and App.config file under Registration, Dashboard, WebJobUsageDaily and WebJobBillingData and enter your values from the PowerShell script

After all these configuration updates, compile and publish the projects and Web jobs on Azure. Right click the project and click build solution:

After the build is completed, click publish

Select Microsoft Azure Web Apps

Select your Azure subscription and select the AUI dashboard first

configure your Webapp as below


Same for the registration portal that we need to publish as well.
You have to enter the authentication Active Directory (AD), so only the users defined under this AD will be able to access the Dashboard webpage.

And lasty we also need to publish the Azure Webjobs


3) Configure Azure Active Directory
We still need to change some settings in Azure AD to make our application multi-tenant. You can open the default Active Directory service settings in the old portal (it is not supported in the new Azure portal at the time of writing this guide) to finalize its settings. Click on the app name, and open the applications configure page. In the configuration settings of the AD app, apply the following changes in order
- Change “APP ID URI” value to an any valid URI in your directory.
i.e.: http://cubesys.onmicrosoft.com/auiv4
As in the above sample, your directory name (i.e. cubesys.onmicrosoft.com) can be found under the settings page in the old portal.

Change the “Permissions to other applications” property by adding “Windows Azure Service Management API” value to the list. _Add “Windows Azure Service Management API” to the list. Then change its “Delegated Permission” property to 1, as shown in the below picture. __Change its “Delegated Permission” value to 1. _Also in the same settings page, be sure that “Windows Azure Active Directory” is selected with “Sign in and read user profile” delegated permission as shown in the below picture


4) Create the SQL Tables
Before being able to collect usage data you need to connect to the newly created SQL server with Visual Studio, SQL Management Studio and run the TSQL commands in “SQLScripts.sql” file to create a table to store billing data and its dependent StoredProcedure. You can find the SQLSCRIPT.SQL file on the right hand side in VisualStudio


Click Run in the right top corner

5) Registration of subscriptions
Once you install and complete all the required configuration steps anyone can access the registration website and register their Azure subscription for monitoring.
- Open a browser InPrivate browsing or logout from all your prev. sessions
- Go to the URL address of the Registration website to register your Azure subscription.
- Logon using your Azure credentials
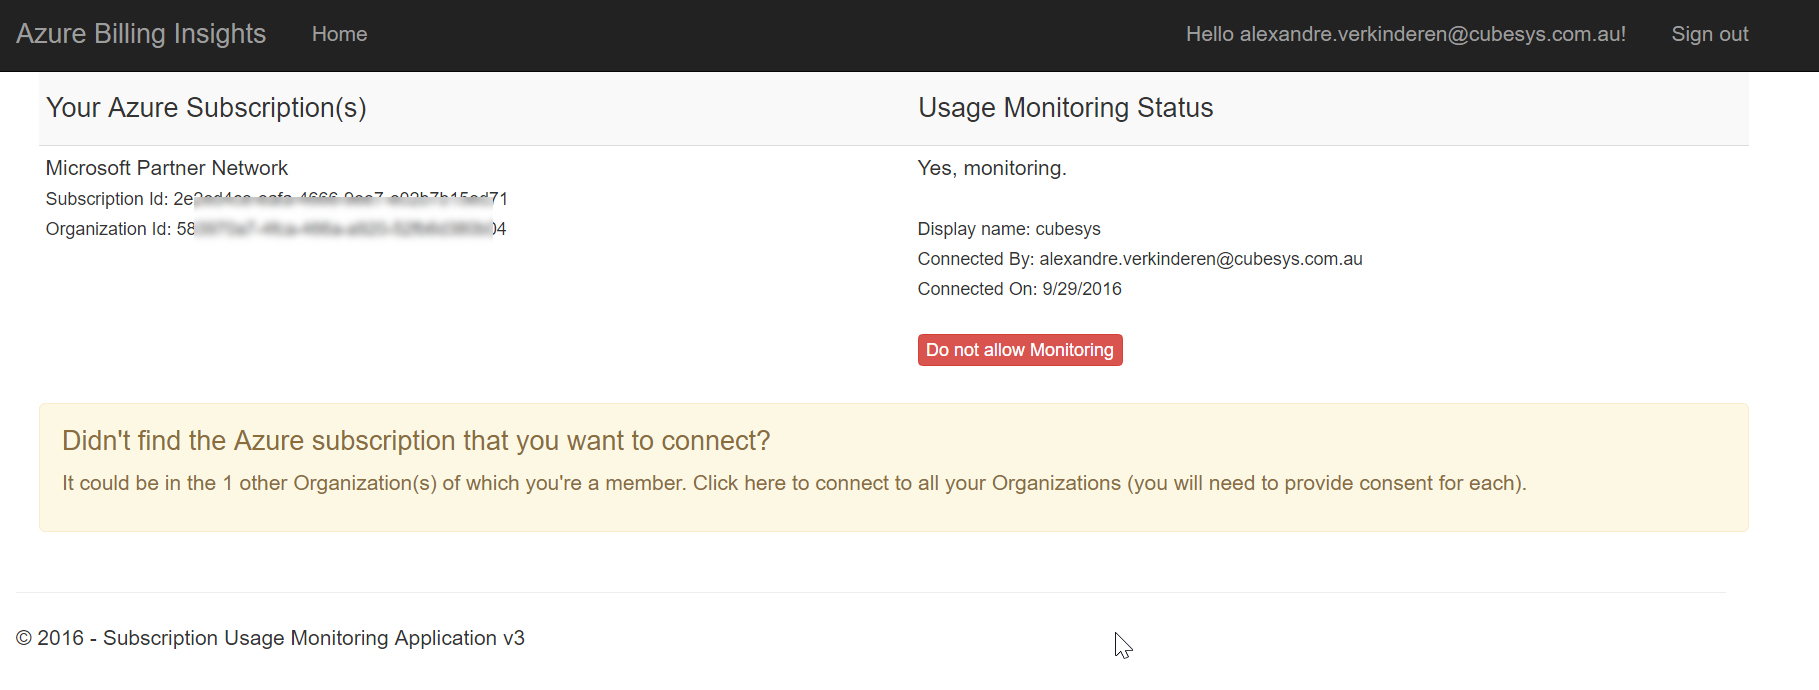
- In the final step a list of your azure subscriptions will be listed. Each list item has a subscription name, a textbox and “Allow Monitoring” button. The user is expected to enter a display name for each subscription (i.e. first and last names) that will be shown in the reports.
- Click allow monitoring
6) Power Bi Desktop
You need to download and install the PowerBI desktop application from https://powerbi.microsoft.com/en-us/desktop. Once you have it, you can open the AUIDashboard.pbix file to modify the existing report and publish it to PowerBI online.
When you open the AUIDashboard.pbix file, initially you will see many errors like “Fix This” as there is no data, because no data connection set.
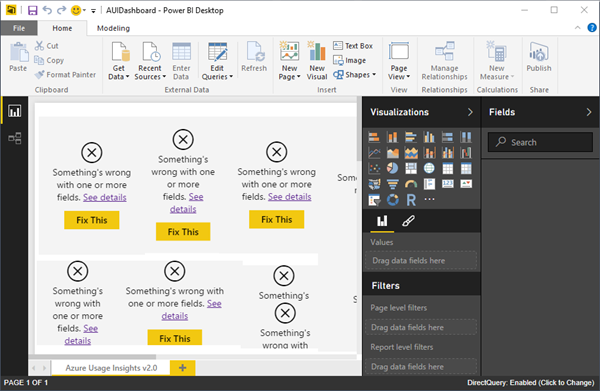
- In the PowerBI Desktop, click Edit Queries button
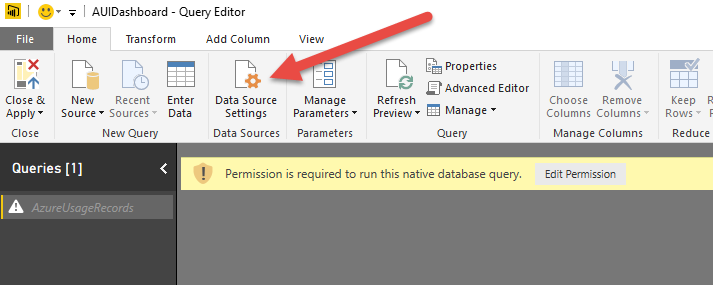
- In the new window, click “Data Source Settings” to make required Database name, SQL Server password updates, etc.
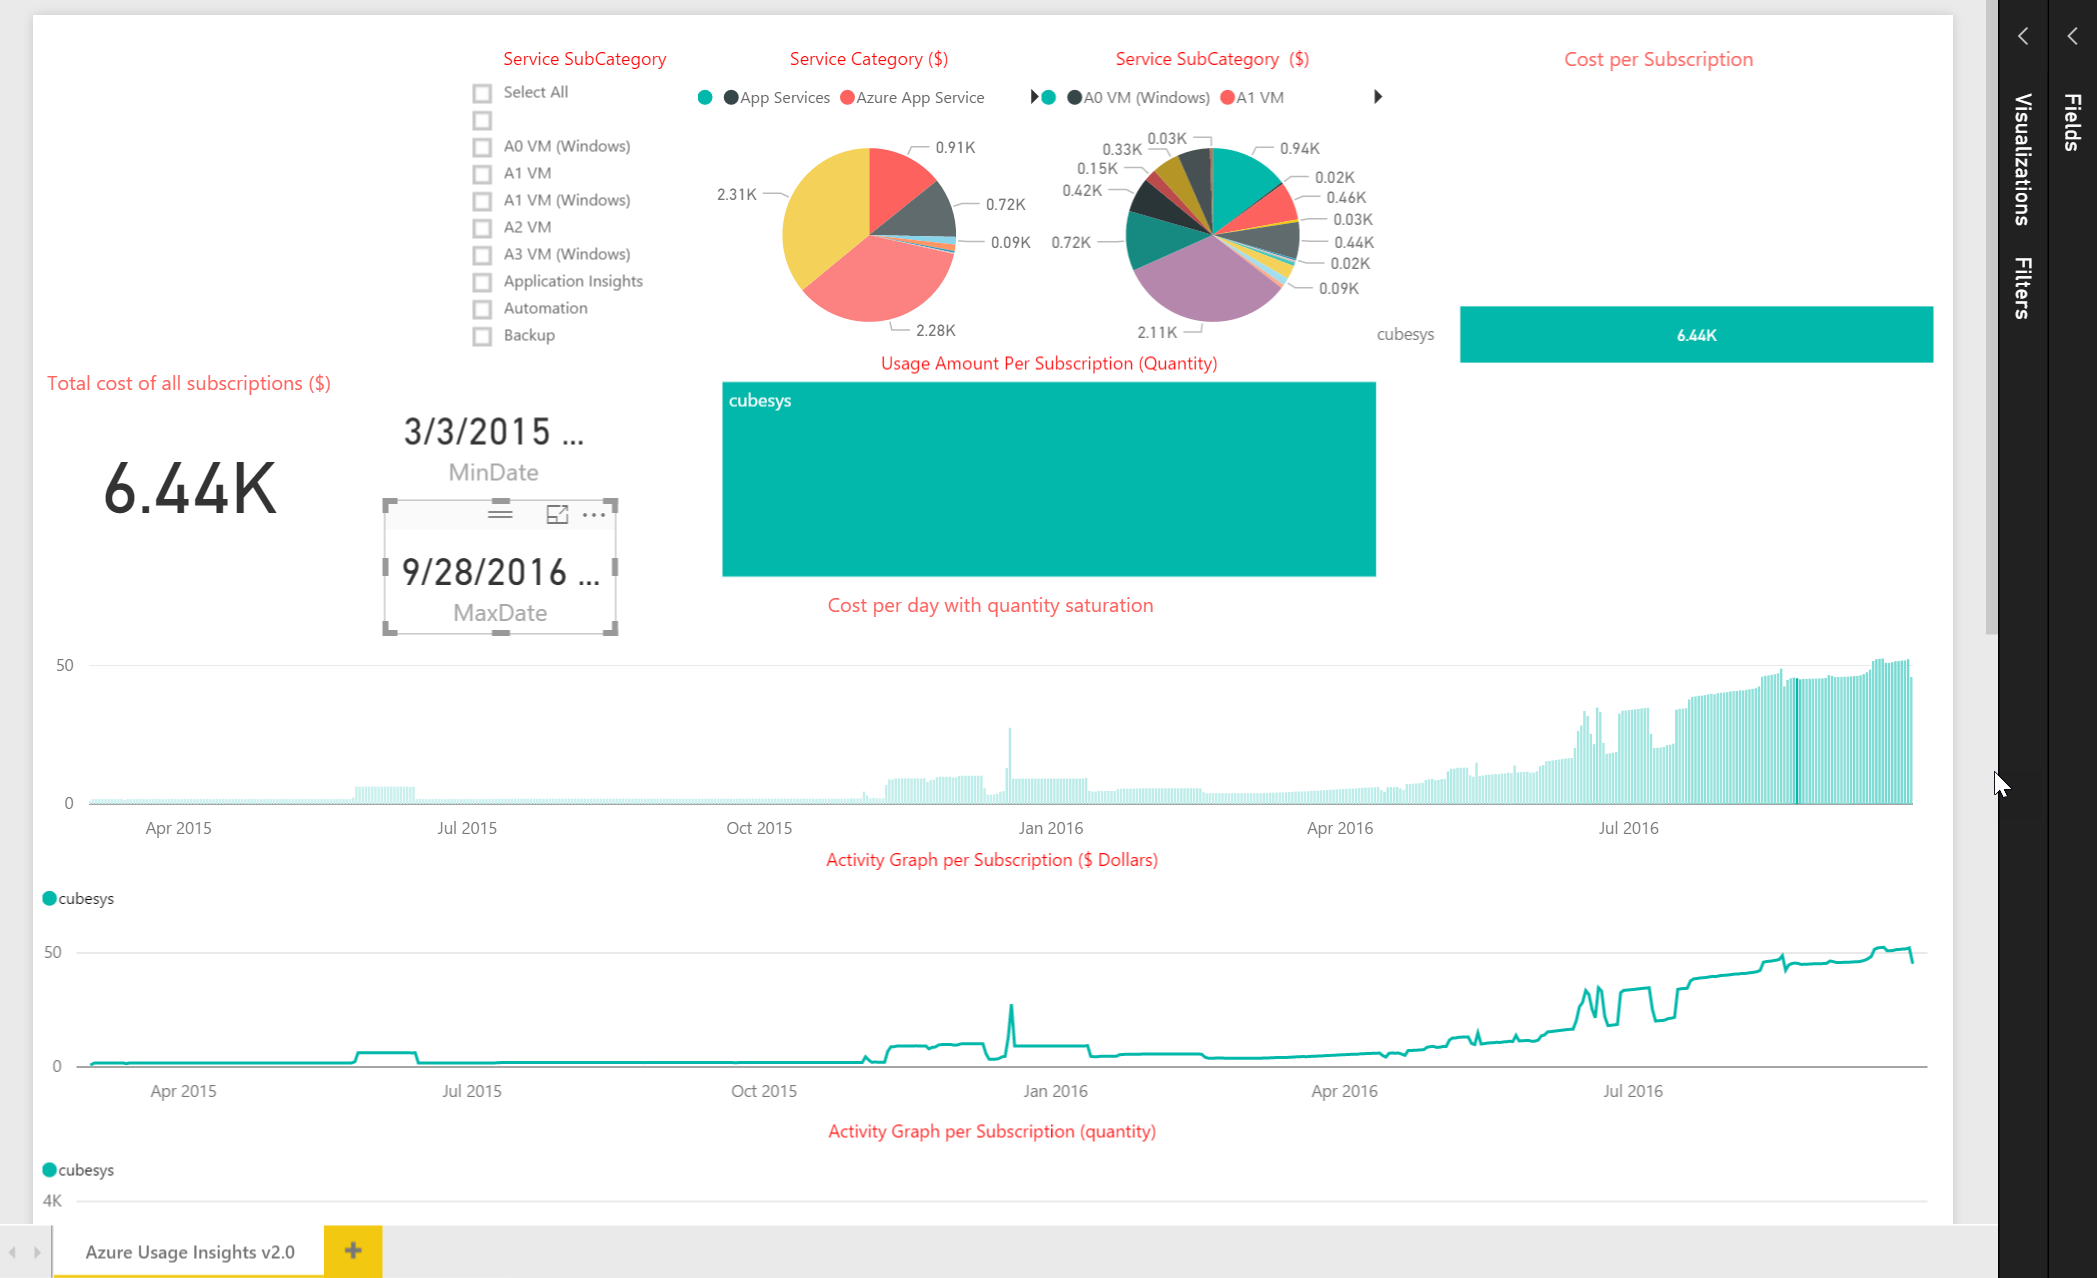
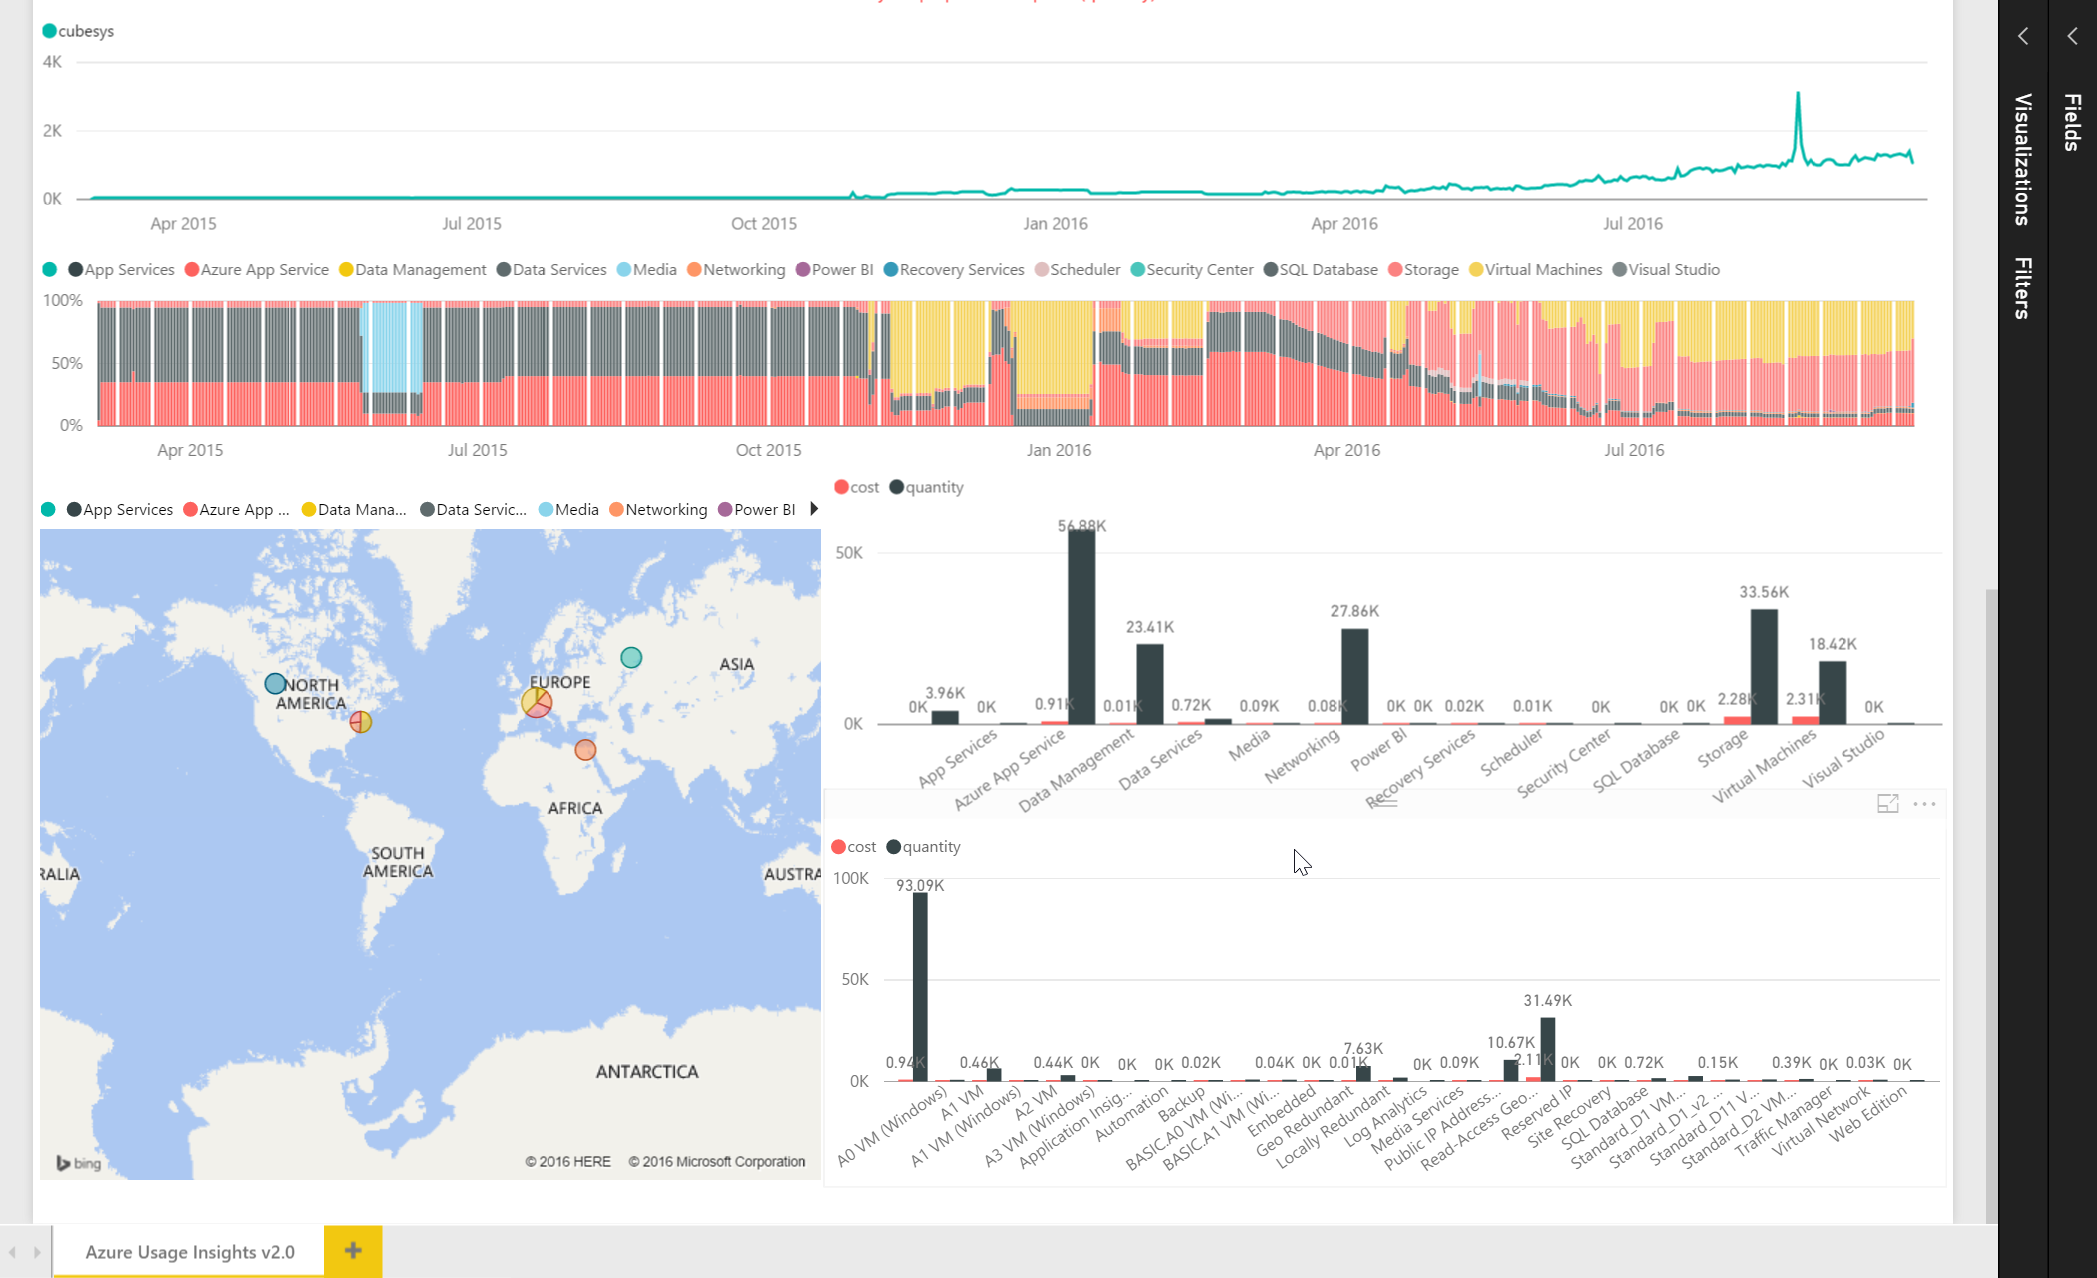
Finally after the permissions have been set correctly in Power BI the data will start to appear:
Conclusion
As you can see it’s relatively easy to deploy the Azure Usage and Billing Portal to visualize your Azure bill.
I suggest you look at this video from Chris and Mustafa on how to setup the Azure billing Portal.
If you have any questions, please let me know.
Kind regards,
Alexandre Verkinderen
Leave a comment