Part 1: How to manage your clouds with Facebook
At SystemCenter Universe Asia I showcased how you can manage your cloud from Facebook:

As I’m really a geek I’m following my servers as friends on Facebook.
So this will not be just one blogpost but will be a series of different posts covering the following:
- Part 1; Installing the Facebook Powershell module
- Part 2: Getting facebook status updates when something happens to my servers like a shutdown or start.
- Deploy a website in Azure from Facebook.
- Adding a new friend (or server) in the cloud
- Unfriending a “friend” (or server) from Azure
Let’s get started with installing the Facebook Powershell module!
First of all download the Facebook Powershell module from here: http://facebookpsmodule.codeplex.com/ . Facebook PowerShell Module is a PowerShell module for managing Facebook, developed in PowerShell script.
The most important functions are:
- New-FBConnection: This command sets up the initial Facebook connection which you will need to use most other commands. You will only need to do this once, after that the connection will be cached in your Windows profile.
- Get-FBFriend: This command retrieves the list of friends of the specified user. Note that default Facebook permissions do not permit Facebook applications to retrieve “friends of friends” lists, even though these are available from the Facebook GUI. This is a limitation of the Facebook API, not of FacebookPSModule.
** - Get-FBAlbum, Get-FBFeed, Get-FBGroup, Get-FBPhoto, Get-FBPost: These commands similarly retrieve other classes of information.
- Get-FBEvent: This command retrieves the list of events of the specified user or group. Only “future” events will be retrieved, and only if the user has not explicitly responded “will not attend”.
- Get-FBMember: Retrieves the list of members of a group.
- Get-FBAssociation: This is a worker function for Get-FBFriends, Events and Feed, but it also provides access to other “Connections” offered by the Facebook Graph API for which specific commands are not yet available.
- Get-FBObjectData: This retrieves data on a specific object. The object can be of any type. The –Fields parameter specifies the data to retrieve; if you do not specify this, Facebook will choose a default set of fields depending on the object type. Get-FBObjectData returns a single object with parameters corresponding to the requested fields. Individual fields may not be present on the return object if they are not specified for the Facebook object, or if you do not have permission to retrieve them. Note that most Get-FB* commands have a -Fields parameter; it is generally more efficient to retrieve them up front rather than make multiple calls to Get-FBObjectData.
- Add-FBBulkPhotos: Copy multiple photos to a Facebook album
*Read-FBBulkPhotos: Copy all the photos in a Facebook album to files, or all the photos in all Facebook albums. - New-FBPost: Creates a new post in the user or page feed.
- New-FBEvent: This command creates a new Facebook event for the current user.
- New-FBEventInvite: Invites users to an existing event.
- New-FBPhoto: Upload a photo from your computer to a Facebook album.
- Show-FBMessageDialog: This command helps send bulk Facebook messages. Facebook does not permit sending messages to be completely automated, but you can use this command to send messages with just a few clicks for each group of 50 recipients.
Once you have donwloaded the zip file run the “FacebookPsModule Aplha .msi”

A welcome window will be open “Click on Next”

The default folder to save the module file in “WindowsPowershell” located in My Document or Documents, Leave it as it is and click on “Next”

Installation starts.

Installation Complete , click on “Close”

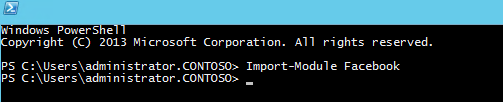
Next open up powershell and import the Facebook module
Connect to your Facebook by typing: New-FBConnection

when you run the New-FBConnection cmdlet a Facebook login windows will open.

Now provide your Email ID and password and make sure that you checked on “Keep me logged in” and then click on “Log In”. Facebook will ask you to approve the “external” application.
After you clicked on allow, all is done and you will see this . that means connection with your Facebook account is successful.

In the next blog post I’m going to show how to get a facebook status update if something happens to one of my servers.
Thanks,
Alexandre Verkinderen
I want to thank Cameron Fuller for brainstorming with me on how this could be achieved.
Leave a comment